In the previous tutorial learning how to write a 3D soft engine from scratch in C#, TS or JS – drawing lines & triangles, we’ve learned how to draw lines & triangles and we really started to see the 3D side our meshes thanks to this wireframe rendering. But we’ve only displayed a cube… And even a simple cube already has 12 faces! Are we going to be forced to handle ourselves all the faces for more complex objects this way? Hopefully not.
3D modelers help the collaboration between 3D designers and developers. The designer can use its favorite tools to build his scenes or meshes (3D Studio Max, Maya, Blender, etc.). Then he will export his work into a file that will be loaded by the developers. The developers will finally push the meshes into his real time 3D engine. There are several file formats available on the market to serialize the job done by the artists. In our case, we’re going to use JSON. Indeed, David Catuhe has done an export library for Blender that output a .babylon file using JSON. We’re then going to see how to parse that file and display the meshes in our lovely soft engine.
Blender is a free 3D modeler you can download here: http://www.blender.org/download/get-blender/
You can write plug-ins in Python. That’s what we’ve done for the exporter.
1 – Writing the core logic for camera, mesh & device object
2 – Drawing lines and triangles to obtain a wireframe rendering
3 – Loading meshes exported from Blender in a JSON format (this article)
4 – Filling the triangle with rasterization and using a Z-Buffer
4b – Bonus: using tips & parallelism to boost the performance
5 – Handling light with Flat Shading & Gouraud Shading
6 – Applying textures, back-face culling and WebGL
By following this tutorial, you will be able to have such a result:
And you’ll see that you’ve already done most of the job in the 2 previous tutorials to do that.
Install the Babylon exporter and generate your own scene with Blender
Once you’ll have installed Blender, please download our Babylon exporter from here: io_export_babylon.py
Copy this file into the scriptaddons directory where you’ve installed Blender (for instance “C:Program FilesBlender FoundationBlender2.67scriptsaddons” in my specific case).
You need to active our plug-in in the user preferences. Go to “File” –> “User Preferences” and the “Addons” tab. Search for “babylon” and activate it by checking the case.

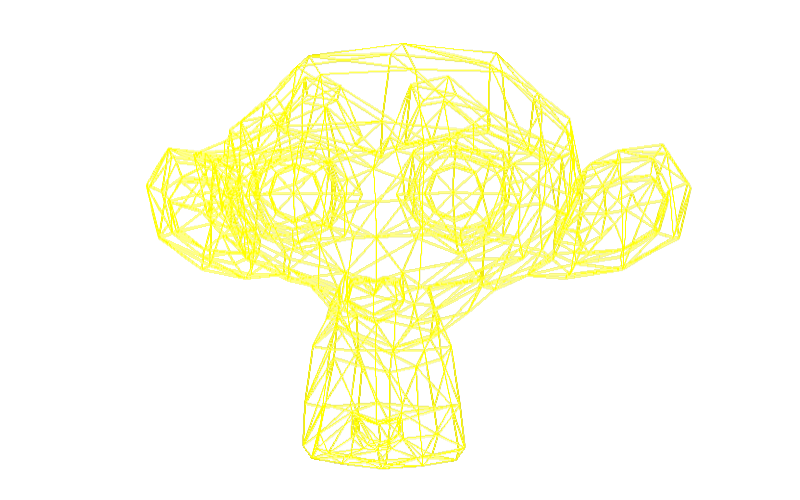
Do whatever you want with Blender. If you’re like me, really bad at building 3D meshes, here is a cool option that will impress your friends during geeks parties: “Add” –> “Mesh” –> “Monkey”:

You should then obtain a screen like that:

Last step is to export it into the .babylon file format (our JSON file). “File” –> “Export” –> “Babylon.js”

Name the file “monkey.babylon”.
Note: this monkey is named Suzanne and is very well-known in the 3D/gaming community. By knowing her, you’re now a proud member of this cool community! Welcome onboard! 😉
Loading the exported JSON file and displaying its meshes
As I was telling you at the beginning of this article, we’ve already built all the needed logic to display more complex meshes like Suzanne. We’ve got our Face, Mesh & Vertex logic. This is all we need for now.
In the JSON format, the Babylon exporter is adding more details than we currently need. For instance, it also adds potential details about the textures, the lights, etc. That’s why, we’re going to parse the file and jump directly to areas we’re only interesting in: the vertices and the faces’ indices to build our wireframe rendering.
Note: for C# developers, you need to install Json.NET from Newtonsoft via nuGet like we’ve done in the first tutorial to add SharpDX. Indeed, JSON parsing is not natively supported in .NET like inside a browser using JavaScript.
Let’s start by adding the loading logic inside the Device object:
// Loading the JSON file in an asynchronous manner
public async Task<Mesh[]> LoadJSONFileAsync(string fileName)
{
    var meshes = new List<Mesh>();
    var file = await Windows.ApplicationModel.Package.Current.InstalledLocation.GetFileAsync(fileName);
    var data = await Windows.Storage.FileIO.ReadTextAsync(file);
    dynamic jsonObject = Newtonsoft.Json.JsonConvert.DeserializeObject(data);

    for (var meshIndex = 0; meshIndex < jsonObject.meshes.Count; meshIndex++)
    {
        var verticesArray = jsonObject.meshes[meshIndex].vertices;
        // Faces
        var indicesArray = jsonObject.meshes[meshIndex].indices;

        var uvCount = jsonObject.meshes[meshIndex].uvCount.Value;
        var verticesStep = 1;

        // Depending of the number of texture's coordinates per vertex
        // we're jumping in the vertices array  by 6, 8 & 10 windows frame
        switch ((int)uvCount)
        {
            case 0:
                verticesStep = 6;
                break;
            case 1:
                verticesStep = 8;
                break;
            case 2:
                verticesStep = 10;
                break;
        }

        // the number of interesting vertices information for us
        var verticesCount = verticesArray.Count / verticesStep;
        // number of faces is logically the size of the array divided by 3 (A, B, C)
        var facesCount = indicesArray.Count / 3;
        var mesh = new Mesh(jsonObject.meshes[meshIndex].name.Value, verticesCount, facesCount);

        // Filling the Vertices array of our mesh first
        for (var index = 0; index < verticesCount; index++)
        {
            var x = (float)verticesArray[index * verticesStep].Value;
            var y = (float)verticesArray[index * verticesStep + 1].Value;
            var z = (float)verticesArray[index * verticesStep + 2].Value;
            mesh.Vertices[index] = new Vector3(x, y, z);
        }

        // Then filling the Faces array
        for (var index = 0; index < facesCount; index++)
        {
            var a = (int)indicesArray[index * 3].Value;
            var b = (int)indicesArray[index * 3 + 1].Value;
            var c = (int)indicesArray[index * 3 + 2].Value;
            mesh.Faces[index] = new Face { A = a, B = b, C = c };
        }

        // Getting the position you've set in Blender
        var position = jsonObject.meshes[meshIndex].position;
        mesh.Position = new Vector3((float)position[0].Value, (float)position[1].Value, (float)position[2].Value);
        meshes.Add(mesh);
    }
    return meshes.ToArray();
}
// Loading the JSON file in an asynchronous manner and
// calling back with the function passed providing the array of meshes loaded
public LoadJSONFileAsync(fileName: string, callback: (result: Mesh[]) => any): void {
    var jsonObject = {};
    var xmlhttp = new XMLHttpRequest();
    xmlhttp.open("GET", fileName, true);
    var that = this;
    xmlhttp.onreadystatechange = function () {
        if (xmlhttp.readyState == 4 && xmlhttp.status == 200) {
            jsonObject = JSON.parse(xmlhttp.responseText);
            callback(that.CreateMeshesFromJSON(jsonObject));
        }
    };
    xmlhttp.send(null);
}

private CreateMeshesFromJSON(jsonObject): Mesh[] {
    var meshes: Mesh[] = [];
    for (var meshIndex = 0; meshIndex < jsonObject.meshes.length; meshIndex++) {
        var verticesArray: number[] = jsonObject.meshes[meshIndex].vertices;
        // Faces
        var indicesArray: number[] = jsonObject.meshes[meshIndex].indices;

        var uvCount: number = jsonObject.meshes[meshIndex].uvCount;
        var verticesStep = 1;

        // Depending of the number of texture's coordinates per vertex
        // we're jumping in the vertices array  by 6, 8 & 10 windows frame
        switch (uvCount) {
            case 0:
                verticesStep = 6;
                break;
            case 1:
                verticesStep = 8;
                break;
            case 2:
                verticesStep = 10;
                break;
        }

        // the number of interesting vertices information for us
        var verticesCount = verticesArray.length / verticesStep;
        // number of faces is logically the size of the array divided by 3 (A, B, C)
        var facesCount = indicesArray.length / 3;
        var mesh = new SoftEngine.Mesh(jsonObject.meshes[meshIndex].name, verticesCount, facesCount);

        // Filling the Vertices array of our mesh first
        for (var index = 0; index < verticesCount; index++) {
            var x = verticesArray[index * verticesStep];
            var y = verticesArray[index * verticesStep + 1];
            var z = verticesArray[index * verticesStep + 2];
            mesh.Vertices[index] = new BABYLON.Vector3(x, y, z);
        }

        // Then filling the Faces array
        for (var index = 0; index < facesCount; index++) {
            var a = indicesArray[index * 3];
            var b = indicesArray[index * 3 + 1];
            var c = indicesArray[index * 3 + 2];
            mesh.Faces[index] = {
                A: a,
                B: b,
                C: c
            };
        }

        // Getting the position you've set in Blender
        var position = jsonObject.meshes[meshIndex].position;
        mesh.Position = new BABYLON.Vector3(position[0], position[1], position[2]);
        meshes.push(mesh);
    }
    return meshes;
}
// Loading the JSON file in an asynchronous manner and
// calling back with the function passed providing the array of meshes loaded
Device.prototype.LoadJSONFileAsync = function (fileName, callback) {
    var jsonObject = {};
    var xmlhttp = new XMLHttpRequest();
    xmlhttp.open("GET", fileName, true);
    var that = this;
    xmlhttp.onreadystatechange = function () {
        if(xmlhttp.readyState == 4 && xmlhttp.status == 200) {
            jsonObject = JSON.parse(xmlhttp.responseText);
            callback(that.CreateMeshesFromJSON(jsonObject));
        }
    };
    xmlhttp.send(null);
};
Device.prototype.CreateMeshesFromJSON = function (jsonObject) {
    var meshes = [];
    for(var meshIndex = 0; meshIndex < jsonObject.meshes.length; meshIndex++) {
        var verticesArray = jsonObject.meshes[meshIndex].vertices;
        // Faces
        var indicesArray = jsonObject.meshes[meshIndex].indices;

        var uvCount = jsonObject.meshes[meshIndex].uvCount;
        var verticesStep = 1;

        // Depending of the number of texture's coordinates per vertex
        // we're jumping in the vertices array  by 6, 8 & 10 windows frame
        switch(uvCount) {
            case 0:
                verticesStep = 6;
                break;
            case 1:
                verticesStep = 8;
                break;
            case 2:
                verticesStep = 10;
                break;
        }

        // the number of interesting vertices information for us
        var verticesCount = verticesArray.length / verticesStep;
        // number of faces is logically the size of the array divided by 3 (A, B, C)
        var facesCount = indicesArray.length / 3;
        var mesh = new SoftEngine.Mesh(jsonObject.meshes[meshIndex].name, verticesCount, facesCount);

        // Filling the Vertices array of our mesh first
        for (var index = 0; index < verticesCount; index++) {
            var x = verticesArray[index * verticesStep];
            var y = verticesArray[index * verticesStep + 1];
            var z = verticesArray[index * verticesStep + 2];
            mesh.Vertices[index] = new BABYLON.Vector3(x, y, z);
        }

        // Then filling the Faces array
        for(var index = 0; index < facesCount; index++) {
            var a = indicesArray[index * 3];
            var b = indicesArray[index * 3 + 1];
            var c = indicesArray[index * 3 + 2];
            mesh.Faces[index] = {
                A: a,
                B: b,
                C: c
            };
        }

        // Getting the position you've set in Blender
        var position = jsonObject.meshes[meshIndex].position;
        mesh.Position = new BABYLON.Vector3(position[0], position[1], position[2]);
        meshes.push(mesh);
    }
    return meshes;
};
You will probably wonder why we’re jumping by 6, 8 & 10 in the vertices array to take our 3D coordinate (X, Y, Z) of our vertices. Again, this is because the Babylon exporter adds more details that we currently need for our wireframe rendering. That’s why, we’re filtering those details using this frame approach. This logic is specific to our file format. If you want to load the export from other (like the one from three.js), you’ll just have to identity where to retrieve the vertices and faces indices in another file format.
Note: to be able to load our .babylon files, TypeScript/JavaScript developers, you need to define a new MIME type “application/babylon” targeting the extension “.babylon”. In IIS, you need to declare it inside your web.config:
  <system.webServer>
    <staticContent>
      <mimeMap fileExtension=".babylon" mimeType="application/babylon" />
    </staticContent>
  </system.webServer>
C# developers, you need to change the properties of the file you will include in the solution. Switch “Build Action” to “Content” and always copy to the output directory:

Otherwise, the file won’t be found.
Finally, we now need to update the equivalent of our main function to call this new LoadJSONFileAsync function instead of creating manually our cube. As we will also have potentially several meshes to animate, we need also to change the rotation values during each tick to every meshes loaded:
private Device device;
Mesh[] meshes;
Camera mera = new Camera();

private async void Page_Loaded(object sender, RoutedEventArgs e)
{
    // Choose the back buffer resolution here
    WriteableBitmap bmp = new WriteableBitmap(640, 480);

    // Our Image XAML control
    frontBuffer.Source = bmp;

    device = new Device(bmp);
    meshes = await device.LoadJSONFileAsync("monkey.babylon");
    mera.Position = new Vector3(0, 0, 10.0f);
    mera.Target = Vector3.Zero;

    // Registering to the XAML rendering loop
    CompositionTarget.Rendering += CompositionTarget_Rendering;
}

// Rendering loop handler
void CompositionTarget_Rendering(object sender, object e)
{
    device.Clear(0, 0, 0, 255);

    foreach (var mesh in meshes) {
        // rotating slightly the meshes during each frame rendered
        mesh.Rotation = new Vector3(mesh.Rotation.X + 0.01f, mesh.Rotation.Y + 0.01f, mesh.Rotation.Z);
    }

    // Doing the various matrix operations
    device.Render(mera, meshes);
    // Flushing the back buffer into the front buffer
    device.Present();
}
///<reference path="SoftEngine.ts"/>

var canvas: HTMLCanvasElement;
var device: SoftEngine.Device;
var meshes: SoftEngine.Mesh[] = [];
var mera: SoftEngine.Camera;

document.addEventListener("DOMContentLoaded", init, false);

function init() {
    canvas = <HTMLCanvasElement> document.getElementById("frontBuffer");
    mera = new SoftEngine.Camera();
    device = new SoftEngine.Device(canvas);

    mera.Position = new BABYLON.Vector3(0, 0, 10);
    mera.Target = new BABYLON.Vector3(0, 0, 0);

    device.LoadJSONFileAsync("monkey.babylon", loadJSONCompleted)
}

function loadJSONCompleted(meshesLoaded: SoftEngine.Mesh[]) {
    meshes = meshesLoaded;
    // Calling the HTML5 rendering loop
    requestAnimationFrame(drawingLoop);
}

// Rendering loop handler
function drawingLoop() {
    device.clear();

    for (var i = 0; i < meshes.length; i++) {
        // rotating slightly the mesh during each frame rendered
        meshes[i].Rotation.x += 0.01;
        meshes[i].Rotation.y += 0.01;
    }

    // Doing the various matrix operations
    device.render(mera, meshes);
    // Flushing the back buffer into the front buffer
    device.present();

    // Calling the HTML5 rendering loop recursively
    requestAnimationFrame(drawingLoop);
}
var canvas;
var device;
var meshes = [];
var mera;

document.addEventListener("DOMContentLoaded", init, false);

function init() {
    canvas = document.getElementById("frontBuffer");
    mera = new SoftEngine.Camera();
    device = new SoftEngine.Device(canvas);
    mera.Position = new BABYLON.Vector3(0, 0, 10);
    mera.Target = new BABYLON.Vector3(0, 0, 0);
    device.LoadJSONFileAsync("monkey.babylon", loadJSONCompleted);
}

function loadJSONCompleted(meshesLoaded) {
    meshes = meshesLoaded;
    // Calling the HTML5 rendering loop
    requestAnimationFrame(drawingLoop);
}

// Rendering loop handler
function drawingLoop() {
    device.clear();

    for (var i = 0; i < meshes.length; i++) {
        // rotating slightly the mesh during each frame rendered
        meshes[i].Rotation.x += 0.01;
        meshes[i].Rotation.y += 0.01;
    }

    // Doing the various matrix operations
    device.render(mera, meshes);
    // Flushing the back buffer into the front buffer
    device.present();

    // Calling the HTML5 rendering loop recursively
    requestAnimationFrame(drawingLoop);
}
You should now have a 3D engine which is capable of loading meshes exported by Blender and animate them in a wireframe rendering mode! I don’t know about you, but I was very excited to reach this stage. 🙂
Again, you can download the solutions containing the source code:
– C# : SoftEngineCSharpPart3.zip
– TypeScript : SoftEngineTSPart3.zip
– JavaScript : SoftEngineJSPart3.zip or simply right-click –> view source on the first embedded iframe
So, what’s next now? Well, we need to fill the triangles. This is called rasterization. We will also handle what we name a Z-Buffer to have a proper rendering. In the next tutorial, you’ll then learn how to obtain something like that:

We will fill the triangles with a random color. See you in the fourth tutorial: learning how to write a 3D software engine in C#, TS or JS – Rasterization & Z-Buffering
Nice, Thanks for this…
After some tweaking of the device implementation I got it running on windows CE as well. Great! Thanks for the tutorial!
Very cool Dan! Good to know. 🙂
Very nice! Gotta try this 🙂
New and Interesting One. Going to try it…………….
🙂
great 🙂
I am following this tutorial in javascript in which i am a beginner. I am failing to run the source, it just shows the blank screen with nothing on it. I reckon it's got something to do with MIME type. Any help would be appreciated. Thanks in advance.
Hi Saad,
You need to define a MIME type handling.babylon file on your webserver. On IIS, you need to add: <mimeMap fileExtension=".babylon" mimeType="application /> for instance.You also need to host the files inside a webserver. It won't work directly from file://
David
Thank you very much, David. I shifted the whole project to an asp.net application and then modified the web.config as per your instruction. and it works 🙂 This tutorial series is very inspiring for beginners in Computer graphics like me, thanks for such an awesome series 🙂
Great! Thanks for your feedback 🙂
Thank you! 🙂
How can i find the java version?
can you add java version here please?
I haven't done the Java version. Some people who has followed these tutorials have made their own version in Java. You can try to do the same 🙂 or try to contact these guys (they post in the comments somewhere)
Thank you very much, David. You created a wonderful inspiring tutorial. So far, I got everything running properly on Windows 7. But I cannot go on beyond one certain step: Following the instruction "Once you’ll have installed Blender, please download our Babylon exporter from here: io_export_babylon.py " I apparently find source code in the window of my Internet Explorer. How to get a file out of this for storing?
Can you give an advice ?
🙂
Rudi
Hi Rudi! Thanks for your feedback.
Simply save the file as "io_export_babylon.py" somewhere on your hard drive and copy it into the specified Blender directory.
David
… done. Now it works. Don´t know wy it did not download the previous times.
Great!
Rudi
Adding the logic for loading the exported JSON file inside the Device object I have no idea how to include the references needed in the two source lines with the await operators.
I am writing my code in C# by using VS2013 Pro (for desktop) on win8.1 as well as on win7 (two separate pcs). As I understand I have to add a WinMD reference by including a folder on my pc, named "C:Program Files (x86)Windows Kits8.1ReferencesCommonConfigurationNeutralWindows.winmd" but cannot do so because my Visual Studio project does not target to Windows 8.0 or higher.
An explanation "How to: add or remove references by using the Reference Manager … Core subgroup" delivered by Microsoft in German language cannot help.
How to continue the SoftEngine Project ? Thanks for any answer.
Rudi
Hi,
This tutorial is really great and saved me from a lot of pain trying to get those matrices to work properly…
After a week of writing matrices and testing things around to have a decent projection of a simple wireframe-cube, I finally found this tutorial where even shading and blender import was done!
I´ve tweaked it to fit my own "canvas-world", (love the optimizing tips btw), and was a bit disappointed about the use of only triangles (maybe I´ll try modifying the exporting later somehow…), but thanks to you I´ve finally managed to get it working right instead of being stuck at the basic projection step! (Rendering with shading wasn´t even on my map before)
I will add a link to this guide in my sources if anyone comes around.
If you don't want to install JSON.NET, you can use System.Web.Script.Serialization.JavaScriptSerializer, which will deserialize JSON into a name/value pair dictionary. Apparently it was deprecated, and then later un-deprecated…
But it does work.
I have been looking all over and can't find an windows 7 alternative for: Windows.ApplicationModel.Package.Current.InstalledLocation.GetFileAsync(fileName);
Windows.Storage.FileIO.ReadTextAsync(file);
Is there someone who can help me? What read function do I have to use to make this work on windows 7. or can I include a package to be able to use this code or something?
I tried with StreamReader and then ReadToEndAsync but the render only gave me 2points in the end.
Never mind. My read file substitude wasn't wrong. I just made a mistake somewhere else. (forgot the faces loop)
I used this as reading substitude, but you could make it a lot simpeler
string path = @"D:ProgramerenEngine ProjectSoftEngineSoftEngine" + fileName;
string data;
using (FileStream file = new FileStream(path, FileMode.Open))
{
using (StreamReader stream = new StreamReader(file))
{
data = await stream.ReadToEndAsync();
}
}
Beware! Looks like the format of the JSON has changed since this was published – the expected vertices array is now called “positions” and has 3 floats per coordinate and the representation of uvs is different. This is still a very valuable article though!
It’s 2025 and I’m following this tutorial using Typescript with a Vite project setup and using VS Code. I installed a VERY old (2.67) version of Blender (the version mentioned in the export addon script file) and the export addon worked like a champ! I’m hoping I continue to have success following this tutorial 12 years after it was made. 🙂
Wow, thanks for sharing! Pretty proud that 12 years later people are still playing with this tutorial 🙂
None of the inline images in the lessons so far have been rendering. I’m assuming wherever they were hosted 12 years ago is no longer there. Do they exist anywhere?
No unfortunately, it was hosted on a Microsoft blog platform that was completely deleted 🙁
I would need to recreate them all.
Which, understandably, isn’t going to happen. Was worth a shot to ask. 🙂